360° Photography / Guide to Drone Panormas
Alex Merryman
1/17/20243 min read
Gear 360 2016
I first introduced myself to 360° Photohraphy in 2018 when I got my first 360° camera a Gear 360 (2016). I used it primarily for shooting photospheres for Google Maps. I even reviewed it on my Youtube channel. Looking back it’s quite cringeworthy but to be fair I was 12 at the time.
Ricoh Theta V
For a few years, I continued to take 360 Photos primarily for Google Maps until I upgraded my camera to a Ricoh Theta V. My reason for this was that the Ricoh Theta V supported taking 360 Videos that met Google's requirements for full continuous street view. Basically meaning you could move with it and it would automatically create a path with the photos. I have since mapped 22.2km of roads/paths garnering 185k views as of when I write this.

Unfortunately, Google has since discontinued their Streetview app making my workflow for uploading photo paths with my Ricoh Theta V more difficult and I have not since recorded any, although I would like to.
My most recent escapade with 360 photography has been with drones. My dad had gotten an original DJI Mavic Pro and fortunately trusted me to fly and use it. I discovered the ability to take 360 panoramas with it.
DJI Mavic Pro
Drone Panorma Workflow
Here I will detail the process of taking, stitching and publishing 360 photos with a DJI Drone.
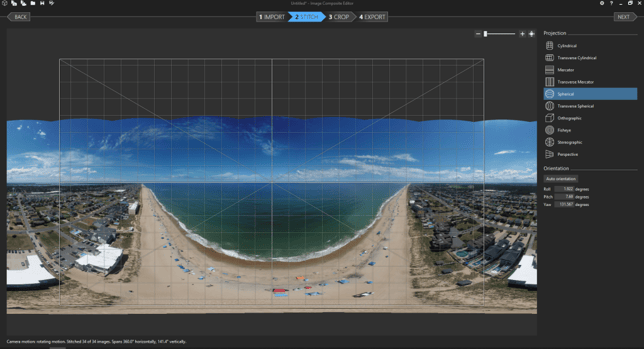
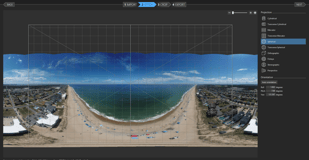
The DJI app won't stitch the images for you but instead, it takes a panorama consisting of 36 photos. Then with the use of Microsoft's Image Composite Editor (ICE), you are able to stitch them together.


With ICE you can easily import the photos and it will automatically align and stitch them together. After properly adjusting the orientation you're basically complete, I would not recommend cropping it. Proceed to export in whichever format you'd like. Keep in mind these photos can get very large and if it's only for Google Maps ultra-high resolution is not of the utmost importance.
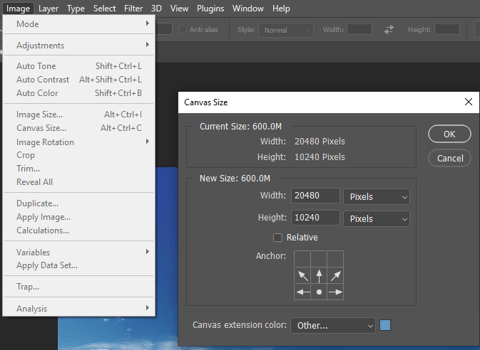
For the next step of the process, I use Photoshop however, a similar process could easily be done in gimp. At this stage, the panorama is completely stitched but it does not have the proper aspect ratio. This is because the drone can’t tilt up to photograph the sky, so ICE will just leave that portion of the image blank. This is an easy fix with Photoshop. Adjust the canvas size to be a 2:1 ratio. When resizing the image it may be beneficial to lower the resolution in an effort to reduce the load on your PC. This leaves you with a solid-colored sky. To fix this select the area and perform a “content-aware fill” You could even take advantage of the new AI generative fill. Export the image but you’re not quite done yet.
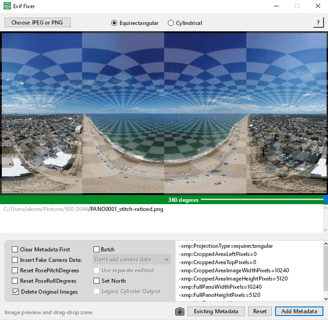
Any software will recognize this as a normal 2D image so you must add the proper metadata. This can be achieved with a tool called Exif Fixer. Simply import the image and add the metadata and you’re finally ready to go.
Now upload the photo to Google Maps, wait for it to process and you’re all set.